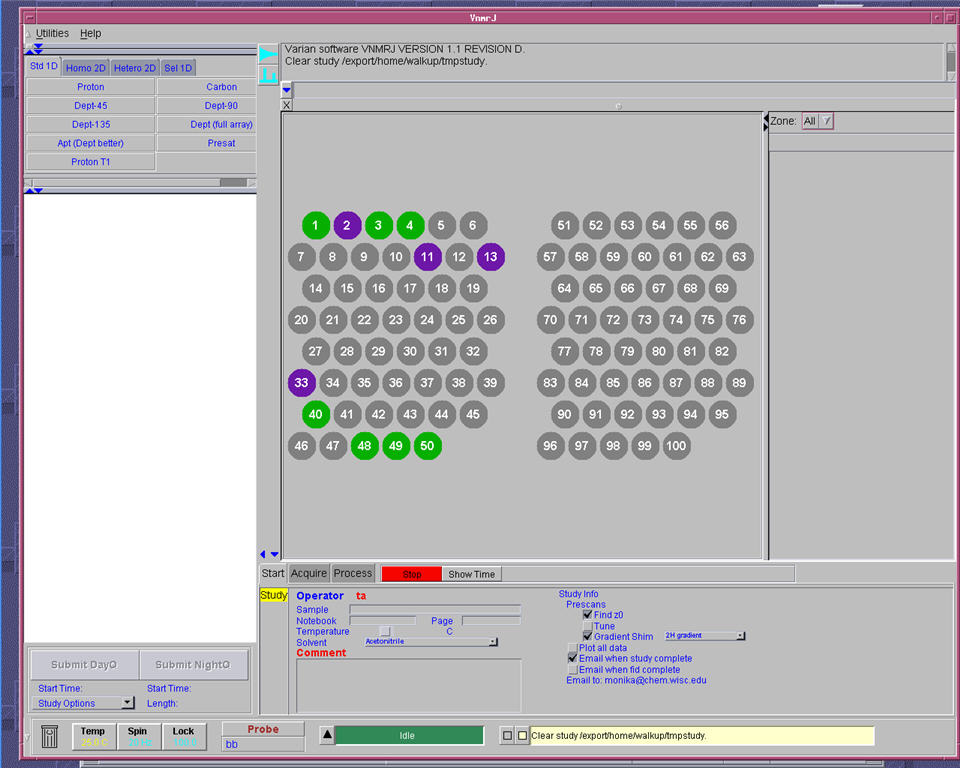
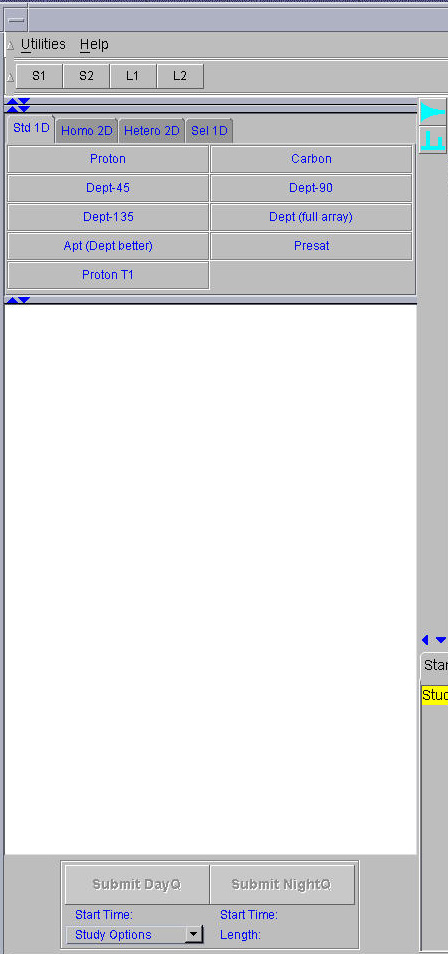
Once logged in, the main VnmrJ window appears (like the one below). There are three main areas: on the left side there is the area where you choose which experiment you would like to run from the Experimental Protocols (gray area at the top). The experiments that you chose will be listed in the Study Queue (white area). There are 4 Protocol tabs, which include different sets of experiments: Std 1D, Homo 2D, Hetero 2D, and Sel 1D. In the image below the Std 1D is selected and the experiments include Proton, Carbon, Dept-45, Dept-90, Dept-135, Dept (full array), Apt, Presat and Array T1.
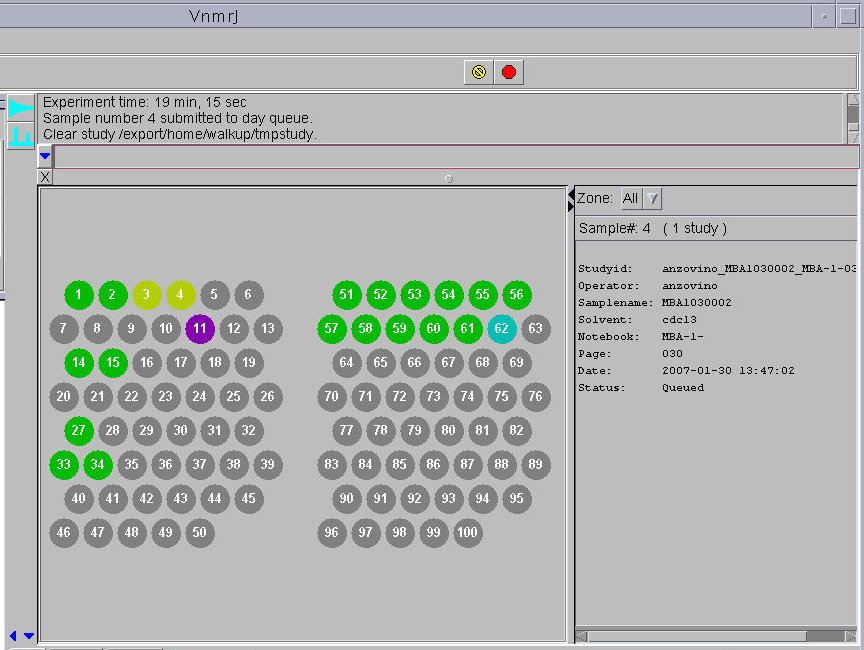
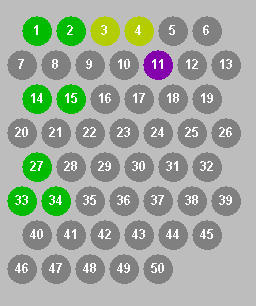
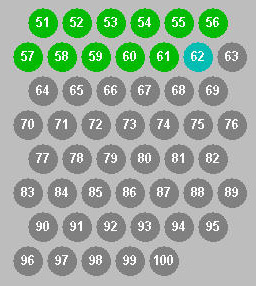
The other main area of the screen is the 'Sample Position Canvas', located in the center/right side. This is the area that shows all the sample position numbers, color coded depending on whether or not the position is being used (the gray ones are open, ie. available). There is a total of 100 sample positions, with zone1 being positions 1 through 50 and zone2 being positions 51 through 100.
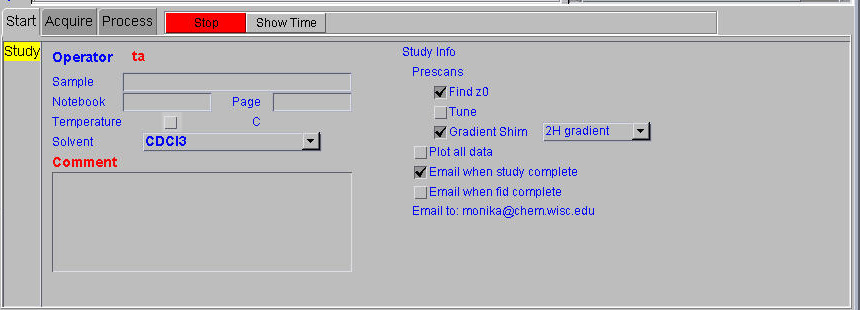
The third main area of the screen is the Parameter Page located in the lower center/right side with different Parameter Tabs (Start, Acquire, Process) at the top of this area. This is where the sample details are entered and experimental parameters can be changed from the default parameters.
The current display shows all the Sample Positions, so <click> on the arrow next to the word 'zone' to get the display changed to showing only zone 1.
Monika Ivancic, February 2007